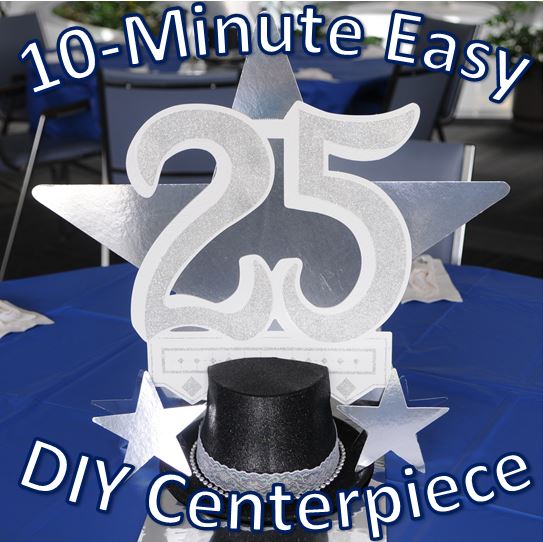
10-Minute Easy DIY Centerpieces
September 30, 2016
Need a new idea for table centerpieces for an upcoming family gathering? Or maybe it’s a class reunion? Flowers are expensive. Photo frames have been done. Nowadays, it’s all about how creative you can be. Check out this design using simple decorations from PartyCheap. This is a DIY you can be proud of and it's so easy you can fashion it with your kids!
 What You'll Need What You'll Need
Instructions
- Starting with your top hat, use your ruler to measure 3 inches from the top front of the hat (not including the brim) toward the back. This is roughly the center of your hat.
- Using your Exacto knife and ruler as a guide, make a cut along that centerline from side to side.
- At each edge, cut down the side of the hat about 1.5 inches.
- Optional: We had lots of craft ribbon available so we added a brim to the base of the hat. Should you choose to do this, use your ribbon to measure the base of the hat. Measure about an inch more than is necessary. Using your glue (we prefer a hot glue gun) secure your ribbon to the hat with the seam at the back.
- Place your beads on the brim of the hat and put a dollop of glue at the back to secure the beads in place.
- Determine where you would like to have the small stars placed on the brim. In the ridge of the brim, cut a small notch in which the foot of the star could fit.
(If you need to transport your centerpieces to a venue, this is where we recommend you stop construction)
- Pair your large star and your 25 crest together and slide into the large notch you created on the top of the hat.
- Place the inner foot of each small star in the small notch in the brim of the hat. Adjust the rotation of the small star for the angle you would like.
Are you interested in a different anniversary or a different color scheme? Here at PartyCheap we have a whole rainbow of colors and numbers to choose from. Making centerpieces for a themed party? We have cutouts for sports, Halloween, Christmas, nautical, and more!
We want to make your celebrations extra decorative and enjoyable. We’re PartyCheap and we know how to party!
For more ideas and party tips check out our PartyCheap Blogs.
Have feedback or questions about this article? Click here to send us your thoughts.
Shop products used in this DIY
|
|